APP INSTRUCTION MANUAL (BO-750BT)
![]() A special app that can monitor the blood oxygen saturation level and pulse rate measured by our company's pulse oximeter and record down the measurement results.
The app can be downloaded for use from the Apple App Store or Google Play Store.
A special app that can monitor the blood oxygen saturation level and pulse rate measured by our company's pulse oximeter and record down the measurement results.
The app can be downloaded for use from the Apple App Store or Google Play Store.
Precautions during use
Check the mobile terminal that you are using for the first time.
The health management app "NISSEI HealStyle" cannot be used except under the following conditions.
- iOS8 or later versions (Compatible with iPhone 4s or later devices and only 5th generation of iPod touch)
- Android 4.3 or later versions (equipped with Bluetooth 4.0 or later versions)
There are some Smartphone models that cannot download the app from the Google Play Store. Check with your mobile phone store if you are not sure of the details.
How to use the app
Registration of account
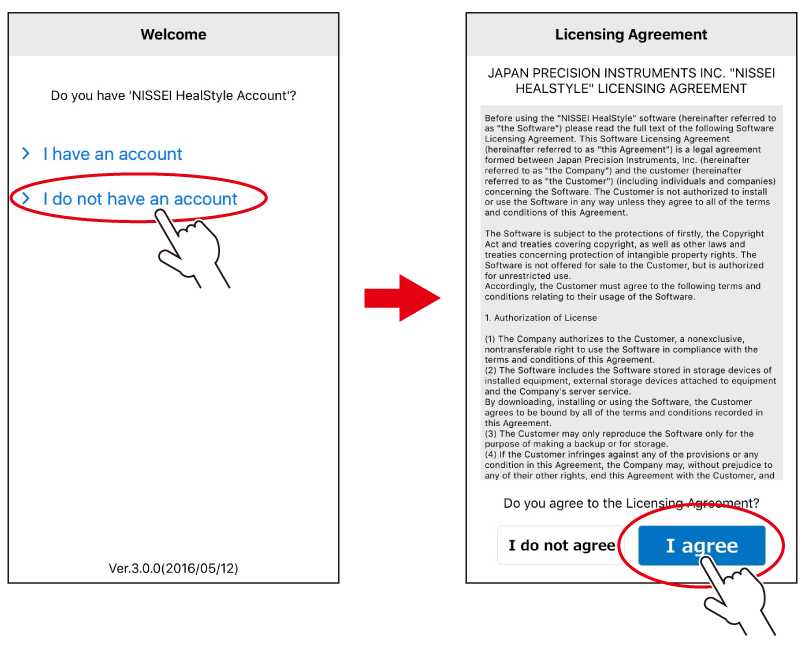
![]() Download "NISSEI HealStyle" from the Apple App Store or Google Play Store.
Download "NISSEI HealStyle" from the Apple App Store or Google Play Store.
If you are using the app for the first time, give your consent to the terms of use and register your account.
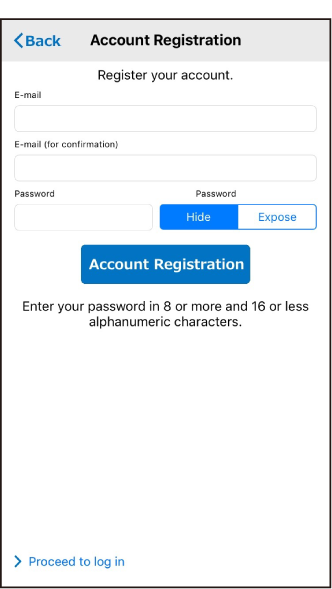 Enter your e-mail address and set up your password.
* Enter your e-mail address correctly as it is required if you want to change your password or if you have forgotten your password.
* Enter your password in 8 or more and 16 or less alphanumeric characters.
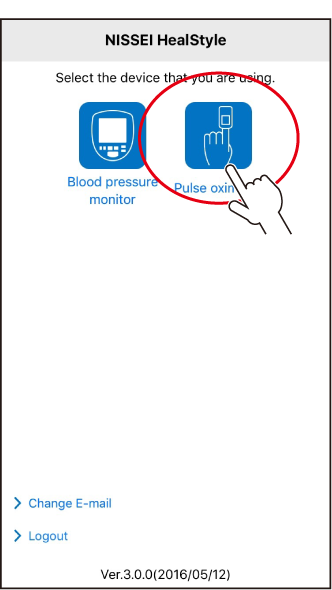
Tap the pulse oximeter icon.
(If you want to use the app with another account, logout once before logging in again. However, log out is not possible if the device is not connected to the Internet.)
Configuring the settings
Tap "Settings" to switch to the settings screen.
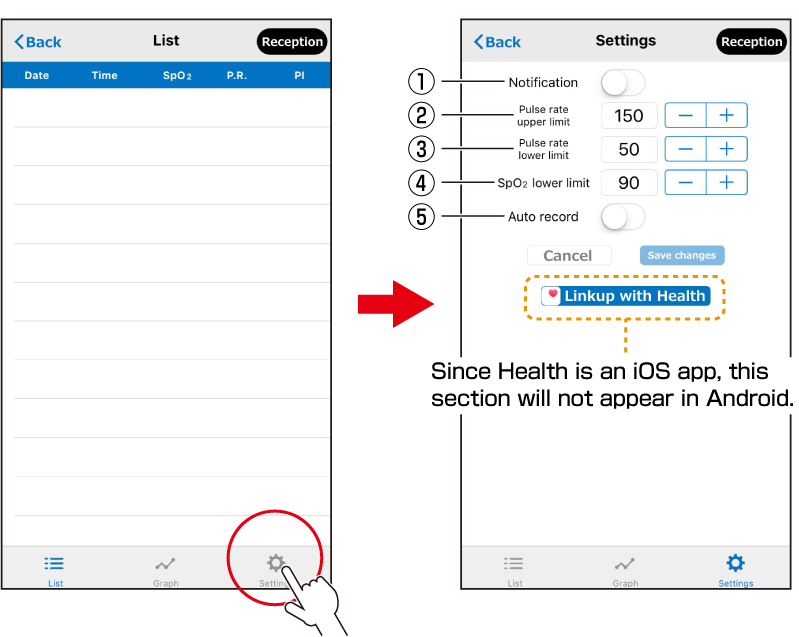
①Notification:When set to ON, a notification will be sounded when the following values set in ②, ③ and ④ are exceeded.
Even if the phone is set to the silent mode, a notification will sound when the set value is exceeded.
② Pulse rate upper limit value
③ Pulse rate lower limit value
④SpO2lower limit value
⑤ Auto record: When set to ON, measurement results are recorded automatically about 10 sec after measurement starts.
Save the changes at the end of the setting.
If you want to terminate the change, tap "Cancel" to return to the previous setting.
Starting the data communication
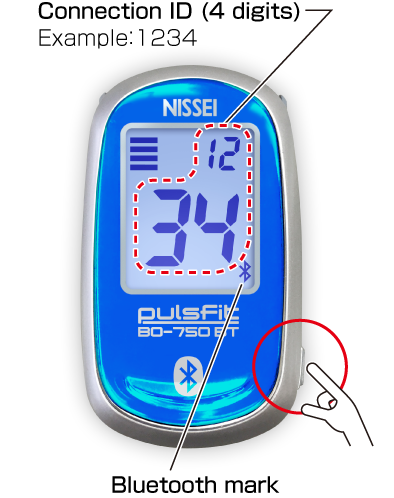 Wear the pulse oximeter on your finger and start the measurement.
Once the measurement results appear, press and hold the display switching button on the pulse oximeter for 3 sec or longer.
The Bluetooth mark on the pulse oximeter will flash and the mode will switch to the communication mode.
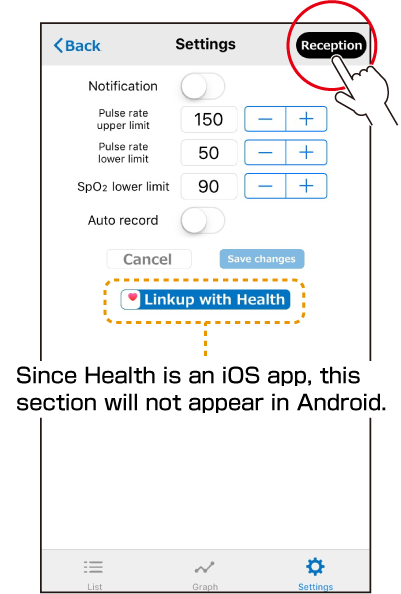 Tap "Reception" in the app.
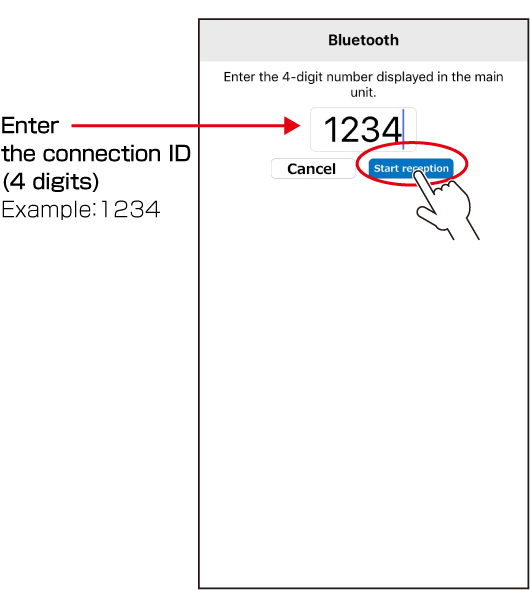 Register the pulse oximeter to be connected to your Smartphone.
Enter the connection ID (4-digit number) displayed in the display screen of the main unit of the pulse oximeter and tap "Start reception".
Start the communication.
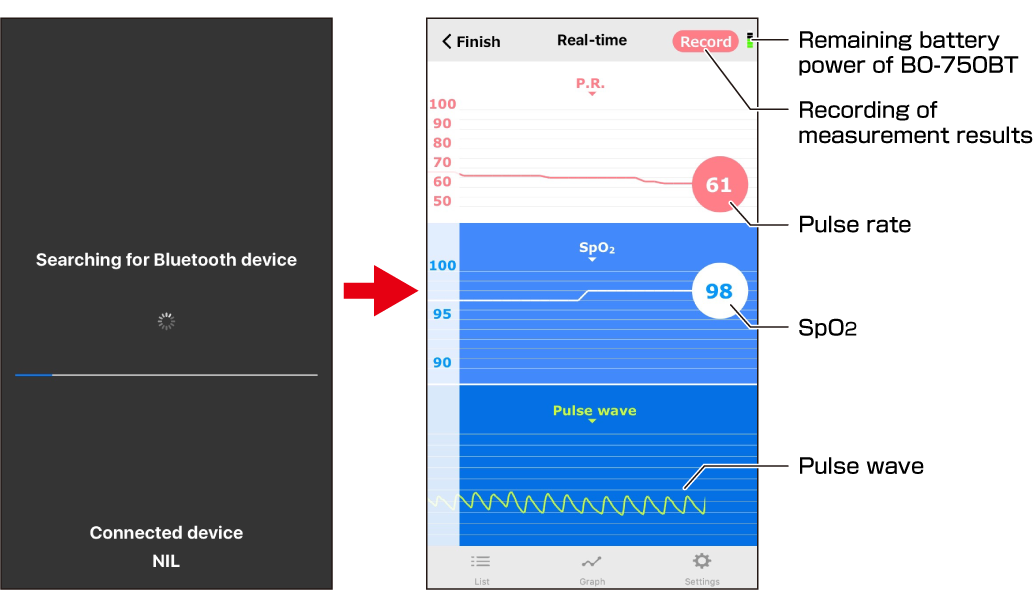
When communication starts, the data under measurement appears in real-time in the app.
Tap "Record" to record the value at the point it is tapped.
*If Auto Record is set to ON in the setting screen, the value is recorded automatically about 10 sec after measurement starts.
If Notification is set to ON in the setting screen, the background will flash in red and an alert will sound when the measurement value exceeds the set value.
Ending the measurement
Tap "Finish" to end the measurement.
The measurement will also end if you remove the main unit of the pulse oximeter from your finger, or press and hold the display switching button on the main unit for 3 sec or longer.
List display
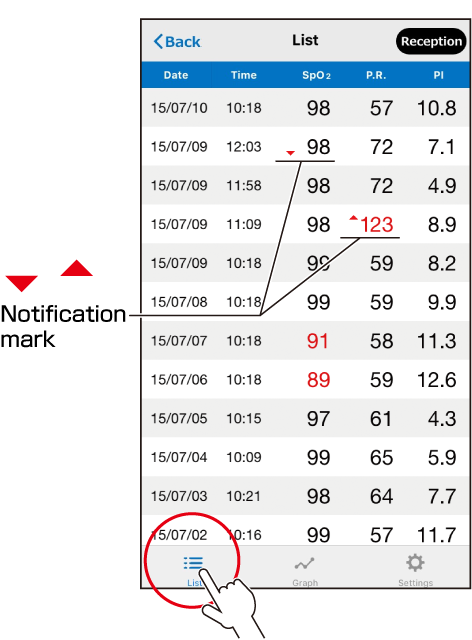 Tap "List" to display a list of the recorded measurement results.
Date :Date the measurement results were recorded
Time :Time the measurement results were recorded
SpO2 :Blood oxygen saturation
P.R. :Pulse rate per min
PI :Perfusion Index
Notification mark:Appears when the measurement is started with Notification set to ON in the setting screen, and the value under measurement falls outside the range of the set values even once. (A notification will sound when this happens)
The mark does not appear if Notification is set to OFF.
Appears in red if the measurement result under display lies outside the range of values set in the setting screen.
Slide the measurement result to the left to delete the measurement result.
Graph display
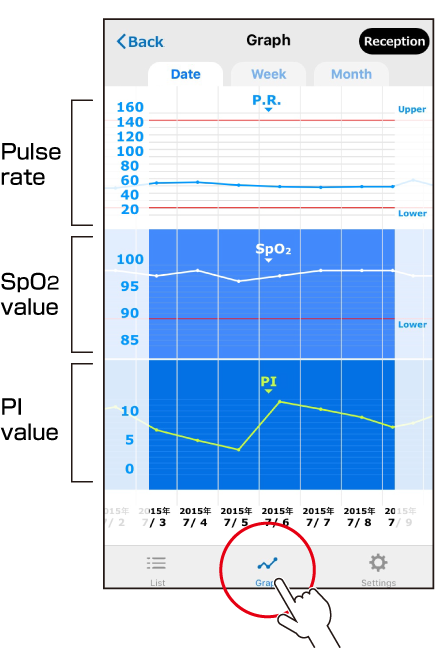 Tap "Graph" to display the measurement results in a graph.
Daily, weekly and monthly values can be displayed in a graph.
Zooming (pinching)
function
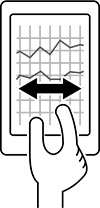
The graph can be zoomed in or out by pinching with 2 fingers on the screen.
Scrolling (swiping)
function
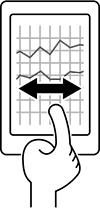
The date of the graph can be moved forward or back by sliding one finger across the screen.
Connecting to Health (iPhone only)
NISSEI HealStyle can perform linkup with iOS Health.
![]()
Tap "Linkup with Health" on the profile screen and start linking up to iOS Health.
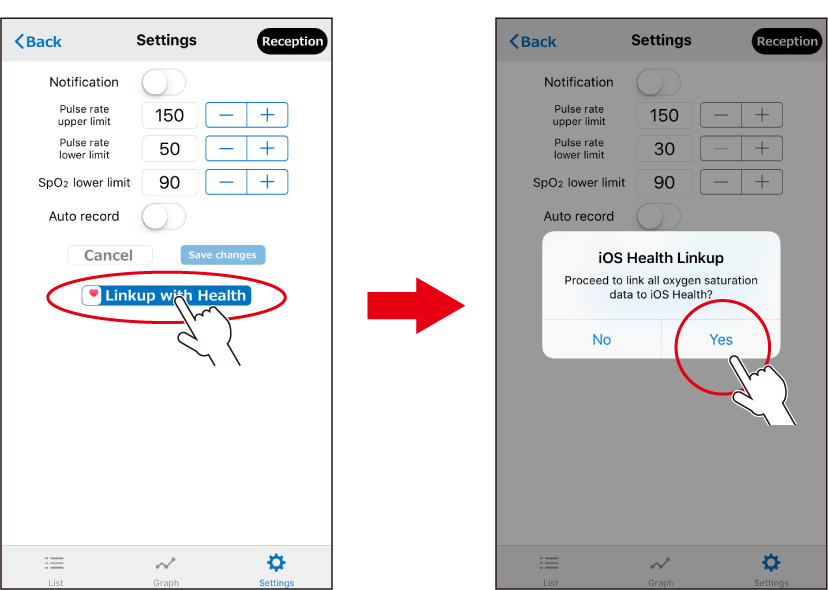
Allow to write and read data when the display switches to the Health screen and then tap Allow.
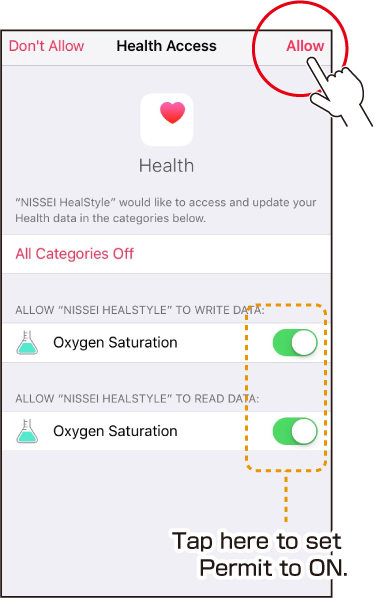
*If Allow is tapped without enabling write and read, it will no longer be possible to linkup to Health from HealStyle.
In this case, start Health and allow to write and read from the Health side before connecting.
Frequently asked questions
Q. What happens when I change my Smartphone etc.?
A. Please login with the e-mail address and password that you have already registered.
Data can be automatically transferred upon login.
(If the data is not transferred even after logging in, tap "Reception" in the app. A message saying that the "Cannot connect" will appear but the data can be transferred by tapping "Cancel".)
Q. Device cannot be linked up to the iPhone's Health.
A. If End is tapped without enabling write and read in the initial connection screen, it will no longer be possible to connect to Healthcare from HealStyle.
In this case, start Health, select NISSEI HealStyle from "Sources" in Health, and allow to write and read data before connecting.


